

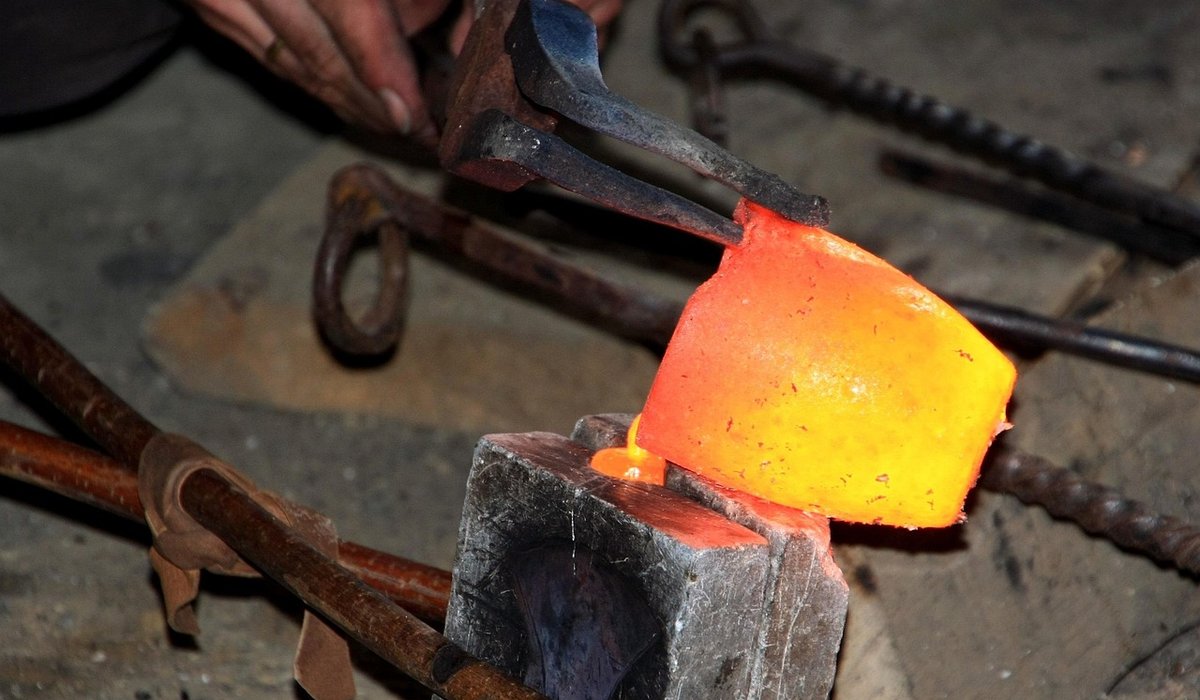
Making a Simple Wrought Iron Wall Hook
Why the humblest hook is the finest teacher
Ask a working smith what a beginner should make first and you will usually get a pause, a smile, and then one word: a hook. It is the blacksmith's handshake. In a single afternoon it asks you to draw out a taper, roll a scroll, make a clean right-angle bend, flatten a plate and punch two holes — five of the core skills, all in a piece small enough to fit in your palm and useful enough that someone will actually want it on their wall.
A wall hook made this way will hold a coat, a set of keys, a bridle or a hanging basket. It costs a few pounds in steel and teaches more than a week of reading about it. What follows is the method I use with students on their first day at the forge.
Steel, tongs and a sensible fire
You need one length of 8 mm round mild steel bar, about 250 mm long. Ten millimetre square bar works just as well and is arguably easier to keep straight, but round bar forges more gracefully into a scroll. Mild steel — sometimes sold as bright or black mild — is the right choice for a first hook. It moves sweetly under the hammer, welds without fuss and takes a finish beautifully.
For tooling you will want:
- A forge capable of bringing the steel to a bright orange-yellow, roughly 1,100 to 1,200°C.
- An anvil with a horn and a pritchel hole.
- A hammer of around 800 g to 1 kg — a cross pein is ideal, a ball pein perfectly serviceable.
- A pair of flat or wolf-jaw tongs that grip the bar securely.
- A hot cut, a wire brush, and scrolling tongs if you have them.
Heat the steel to a good bright orange before you touch it. If it starts throwing sparks in the fire it is burning, not forging, and the metal will be ruined. If it looks dull red on the anvil, it is too cold — back in the fire.
Drawing out the taper
Take a bright orange heat on the last 80 mm of the bar. Lay it across the anvil with the hot end hanging over the far edge, and strike down and slightly outward, working from the shoulder of the taper towards the tip. Rotate the bar a quarter turn between blows so the taper stays round rather than flattening into a blade.
Aim for a taper about 60 to 70 mm long ending in a blunt, slightly rounded point roughly 4 mm across. Resist the temptation to chase the very tip down to a needle — it cools fastest, burns most easily, and a fine point is not what a hook needs. Reheat as soon as the steel drops below a good orange. Three or four heats is normal for a first attempt, and there is no shame in five.
Rolling the scroll
Bring the tapered end to a bright heat and lay it across the horn of the anvil, a little back from the tip. Tap the tip over into a gentle curve, then move the work along so the next section follows the curve you have just started. The scroll grows from the tip backwards, not from the shank forwards — this is the single most common mistake beginners make.
Once the curl is established, you can finish it over the horn or in the hardy hole, or grip it with scrolling tongs for the final turn. You are looking for a scroll about 25 mm across with a visible open eye, the coil sitting just clear of the shank rather than pressed against it. Keep the taper even through the curl. A scroll that thins dramatically as it turns looks accidental; one that holds its weight looks deliberate.
The bend, the backplate and the punch
Now heat the bar about 60 mm back from the scroll and bend it sharply over the horn or the anvil edge until the hook stands at a right angle. The projecting arm should reach roughly 80 mm out from the wall — deep enough for a hat, short enough that it will not fold under load.
Take the remaining straight end to a bright heat and hammer it flat into a backplate: about 25 mm wide, 5 mm thick and 70 mm long, sitting in the same plane as the wall. Work it on the anvil face with the flat of the hammer, turning it as you go so it stays true.
Punch two screw holes through the plate, roughly 5 mm, spaced 40 mm apart so the hook cannot rock. Punch from one face until you feel the point break through, then turn the plate over and punch back from the other side. This keeps the hole clean instead of leaving a ragged, torn exit. Punch over the pritchel hole so the punch has somewhere to go.
Finishing, fixing and the small things that matter
Take the finished hook to a black heat — just below red — and scrub it all over with a wire brush until the scale falls away and the surface turns a soft, even grey. While it is still warm, wipe it with boiled linseed oil or rub it with a beeswax block. Both will soak in and leave a matt, protective finish that deepens with age. Do not quench mild steel in water to cool it; you gain nothing and risk a stress crack at the bend.
To fix it, drill your wall with a masonry bit matched to your plugs — 5.5 or 6 mm for most No. 8 screws — and check the hook with a spirit level before you tighten anything down. Countersink the punched holes lightly so the screw heads sit flush, and use screws long enough to reach the plug properly.
Hang it up, stand back, and look at what you have made: a taper, a scroll, a bend, a plate and two clean holes. Every one of those skills scales straight up into gates, railings and fire tools. The hook is small, but it is not a beginner's toy. It is the whole craft in miniature.


Forging Basics
-
The glow of steel reveals its temperature. Learn to read colours from dull red to bright yellow for accurate forging and heat treatment.


Projects


-

Long established fact that a reader will be distracted
-

Long established fact that a reader will be distracted
-

Long established fact that a reader will be distracted


Tooling
Karla Gleichauf
12 May 2017 at 05:28 pm
On the other hand, we denounce with righteous indignation and dislike men who are so beguiled and demoralized by the charms of pleasure of the moment
M Shyamalan
12 May 2017 at 05:28 pm
On the other hand, we denounce with righteous indignation and dislike men who are so beguiled and demoralized by the charms of pleasure of the moment
Liz Montano
12 May 2017 at 05:28 pm
On the other hand, we denounce with righteous indignation and dislike men who are so beguiled and demoralized by the charms of pleasure of the moment